Flaming the Base Coat


If the silver does not deposit evenly on the base coat in spite of following our instructions on cleaning, wetting and sensitizing to the letter, we have two suggestions. Use Silver Remover to clean off the piece and then flame treat the base coat or use our process for Dipping Chrome.
Why does the water bead up?
Plastics such as polyurethane (Clear Uni-Coat) repel water because, unlike glass, they have a very low level of surface energy. Water molecules on the surface are more attracted to each other than they are to the plastic so they form beads and roll off. The answer is to increase the chemical attraction between the plastic and the water.
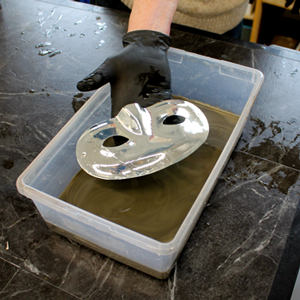
This photo shows what can happen when you silver a piece that has not been thoroughly wetted. Depending on the level of the wetting problem, you may find it still silvers but the silver is speckled.
Why flaming improves wetting and adhesion
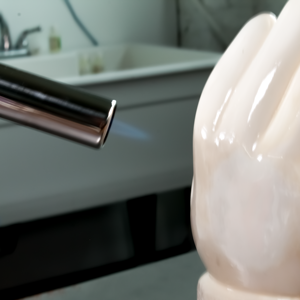
When you pass a lean blue flame about 1 inch above a plastic surface, the heat from the flame ionizes the air around it. The ionized oxygen alters the structure of the surface molecules which increases their surface energy. The energized molecules can now bond to the water-based Sensitizer which bonds to the silver. This chemical process is often visible as a thin mist rising in front of the flame.
Do not allow the blue cone of the flame to touch or burn the base coat. You are not trying to heat or melt the base coat – you are using the flame to create an ionized air stream over it. A thin blue oxidizing flame creates a more ionizing atmosphere than a heavy, bushy flame.
How to flame the base coat
Preparation
- Clean the cured base coat with Liquid Cleaner and dry it to avoid baking in any dust or grit.
- Place your piece on a non-flammable surface away from any flammable objects.
- Use a standard propane torch from the hardware store. Obey ALL precautions on the label.
Flaming
- Light the torch and adjust it to a narrow blue (oxidizing) flame.
- Hold the torch so that the inner cone of the flame is about 1 inch above the surface of the piece.
- Begin at one end of the piece and pass the torch slowly down to the other end. For large pieces, move in stripes to cover the piece evenly.
- Keep the torch moving to avoid melting or burning the surface.
- You should see a light mist rising from the surface just ahead of the flame.
Silvering (chroming)
Turn off the torch. The piece should be cool enough to pick up with your gloved hands (wear gloves to keep the piece clean). Proceed with the chroming process starting with Wetting Agent and Sensitizer. The effects of flaming last a few hours so it is best done the same day as the silvering


NOTE: The idea of flaming the base coat is not new. We have been reluctant to suggest it because, in most cases, our Wetting Agent is a safe and effective alternative and because a lit propane torch is DANGEROUS. Remove ALL flammable objects from your work area and NEVER leave a lit torch unattended.
Angel Gilding has no control over the way in which these instructions are used and disavows all responsibility for any consequence arising from this process.

